Google Wants Our Water. All 9 Billion Gallons. They're Not Going to Get It.
There's a plan, and it's working.
There's a plan, and it's working.

Make it while you can.

Earlier this year, the UN declared a “global water bankruptcy.” Look at that map. It’s from the U.S. Drought Monitor, a few days ago.
We’re heading into a super El Niño. For many of us, the droughts are going to get even worse. That means water restrictions. It means water pressure problems. It means problems with drinking water and toilets. Maybe not today, maybe not tomorrow, but someday soon, maybe for the rest of your life. If you can’t flush, that’s a major dilemma. Without functioning toilets, you have a waste problem. A waste problem becomes a disease problem. With data centers popping up all over the country, the threat multiplies. We’re talking about a large portion of the country in severe drought, on a failing grid, on a regular basis going forward. It might be a good idea to think about where you’re going to go.
You know, go…
My family lives in the suburbs. We contacted plumbers about installing composting toilets. Their quotes ran into the thousands. You see, composting toilets are designed for cabins, RVs, and tiny homes, not suburban houses.
And definitely not apartments…
These problems aren’t going away. Even as we advocate, organize, and resist, we’re going to have to deal with reality. The reality is that even if a data center never moves next door, even if your taps never run dry, odds are you’ll face some kind of prolonged emergency that renders your toilet inoperable.
We came up with a workaround.
As many of you know, I’ve spent the last several months working on solutions and putting them in an illustrated guide. I’m still working on it. For the last several weeks, I’ve circled back around to the most important topics to tweak my plans and offer even better solutions. So, let’s talk about a big one:
Toilets.
Previously, I’ve written about ways to generate water during a crisis. I’ve written about rain catchment systems, water generators, and dew harvesters. You can find all of that information in my guide. For now, we’re focusing on toilets. Because if you and your neighbors don’t have a clean way to dispose of your waste, that’s a problem. Lack of sanitation after disasters drives disease.
It can be worse than the disaster itself.
So, that’s the reason...
We covered some of this information in my last post on composting toilets, but let’s review: You can find plenty of online articles explaining the basics of composting toilets, but Joseph Jenkins provides the most detailed breakdown in two books widely considered the definitive guides on composting: The Humanure Handbook and The Composting Toilet Handbook. A few readers recommended them to me, so I got them and read them. Then my family started to innovate.
So, what’s the fundamental philosophy here?
Let microbes do the work.
The world is full of thermophilic bacteria that evolved especially to break down organic matter. These microbes don’t pose a threat to us. They reside everywhere, dormant, in spores, waiting for things to die. Then they activate and go to work. They destroy the pathogens that cause diseases, including E. coli and Salmonella. They cleanse the dead. It just takes a while.
We’re using the term “waste” in this article, because that’s what most people consider it. Of course, Jenkins and other composters use the term “toilet material,” because what we drop into our toilets isn’t waste. It’s food for healthy microbes, and it’s a foundational ingredient of soil. You can’t compost your waste unless you have a functional compost toilet.
We wanted something that would work almost anywhere, in a house in the suburbs, or an apartment in a downtown area.
We made one.
We made our first design from scratch.
Then we found this:
The NettyGo started becoming a popular option for van lifers around 2022-2023. This solves most of your problems. It’s a portable toilet bucket with a urine diverter and a ventilation kit. We modified it, and I’ll explain how.
Here’s what it looks like:
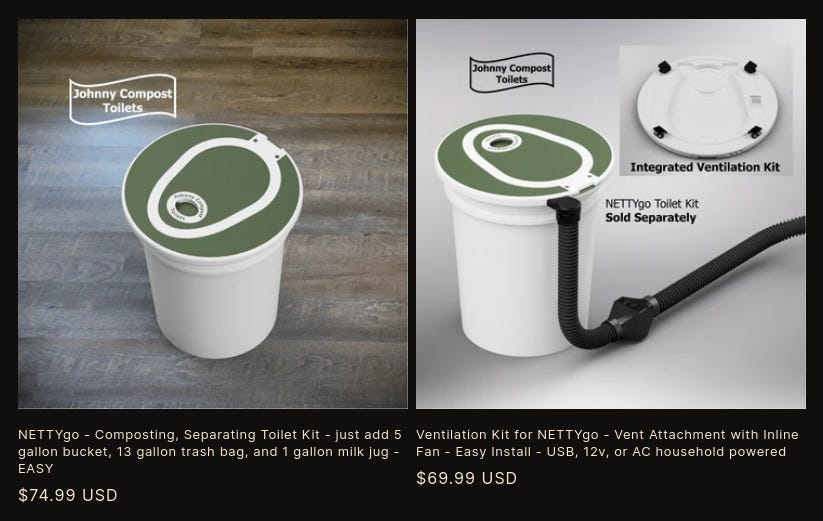
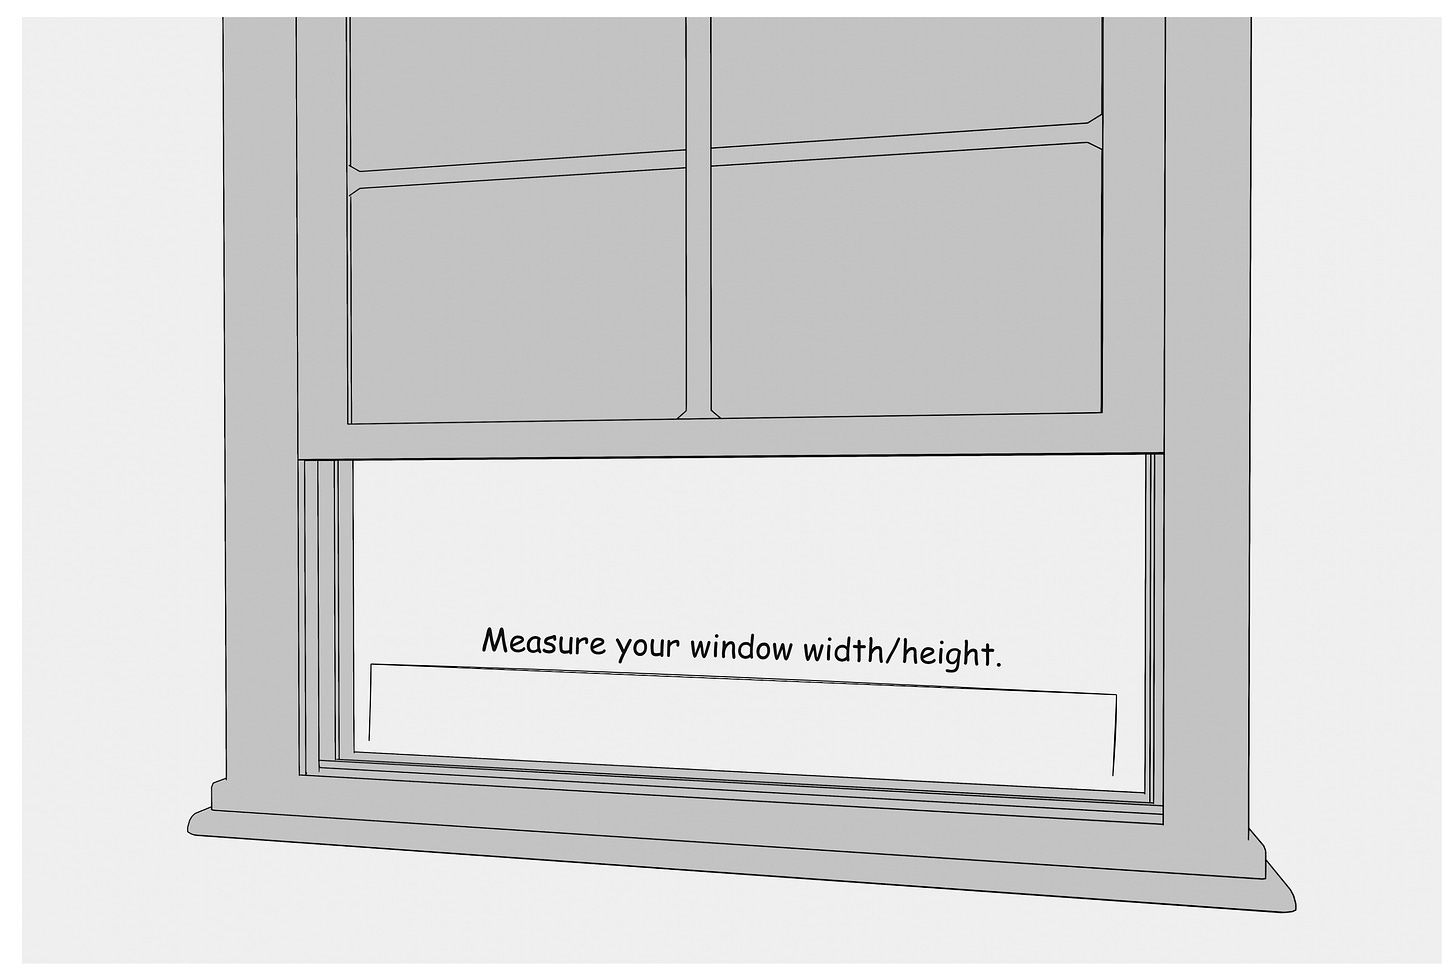
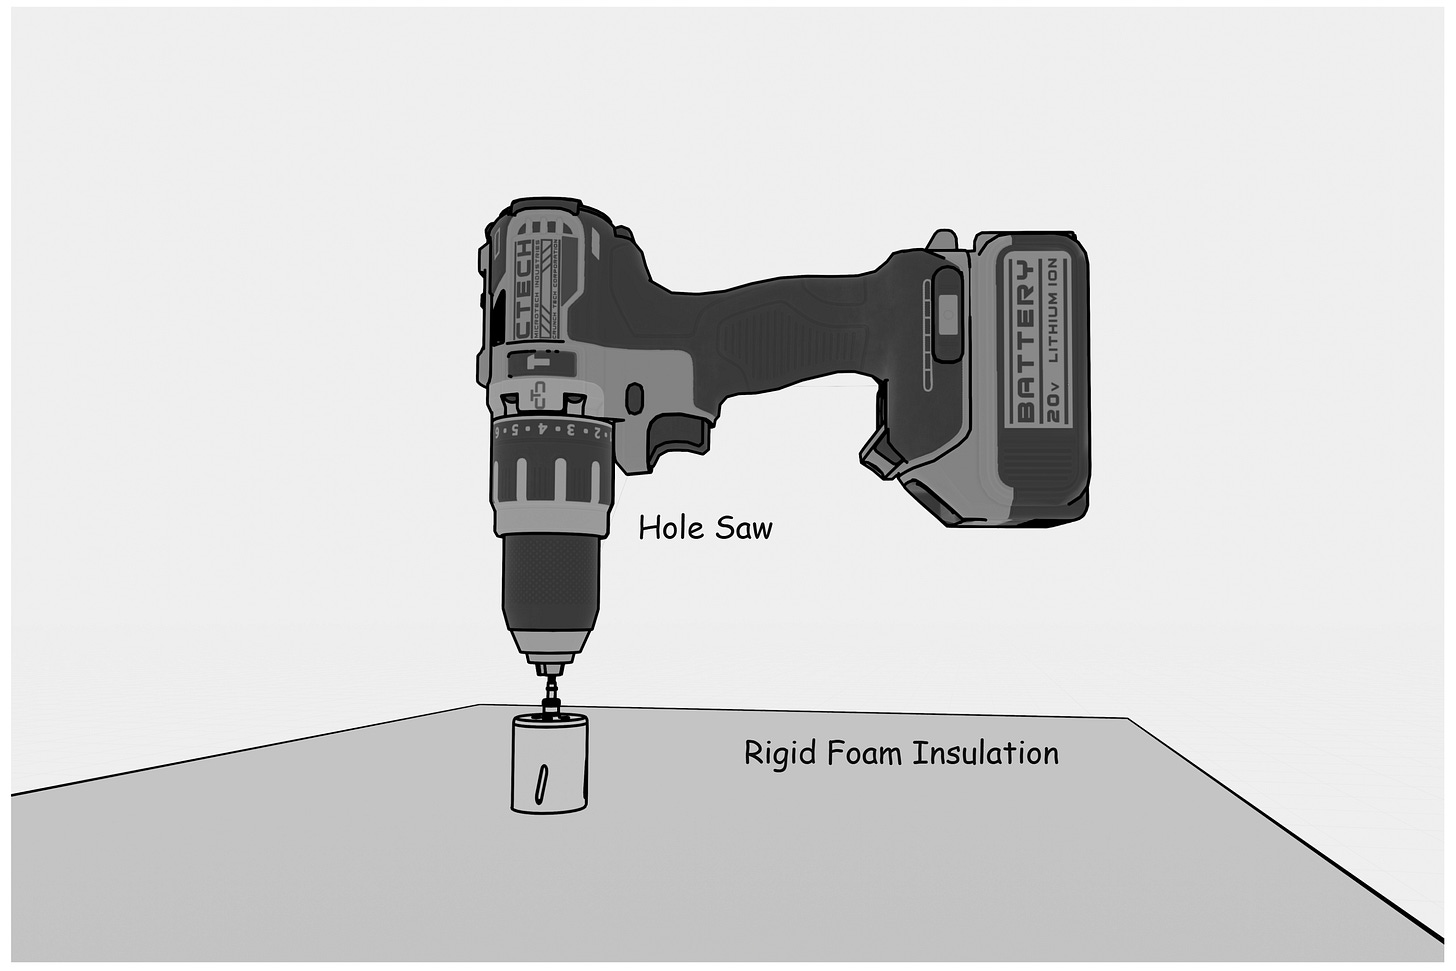
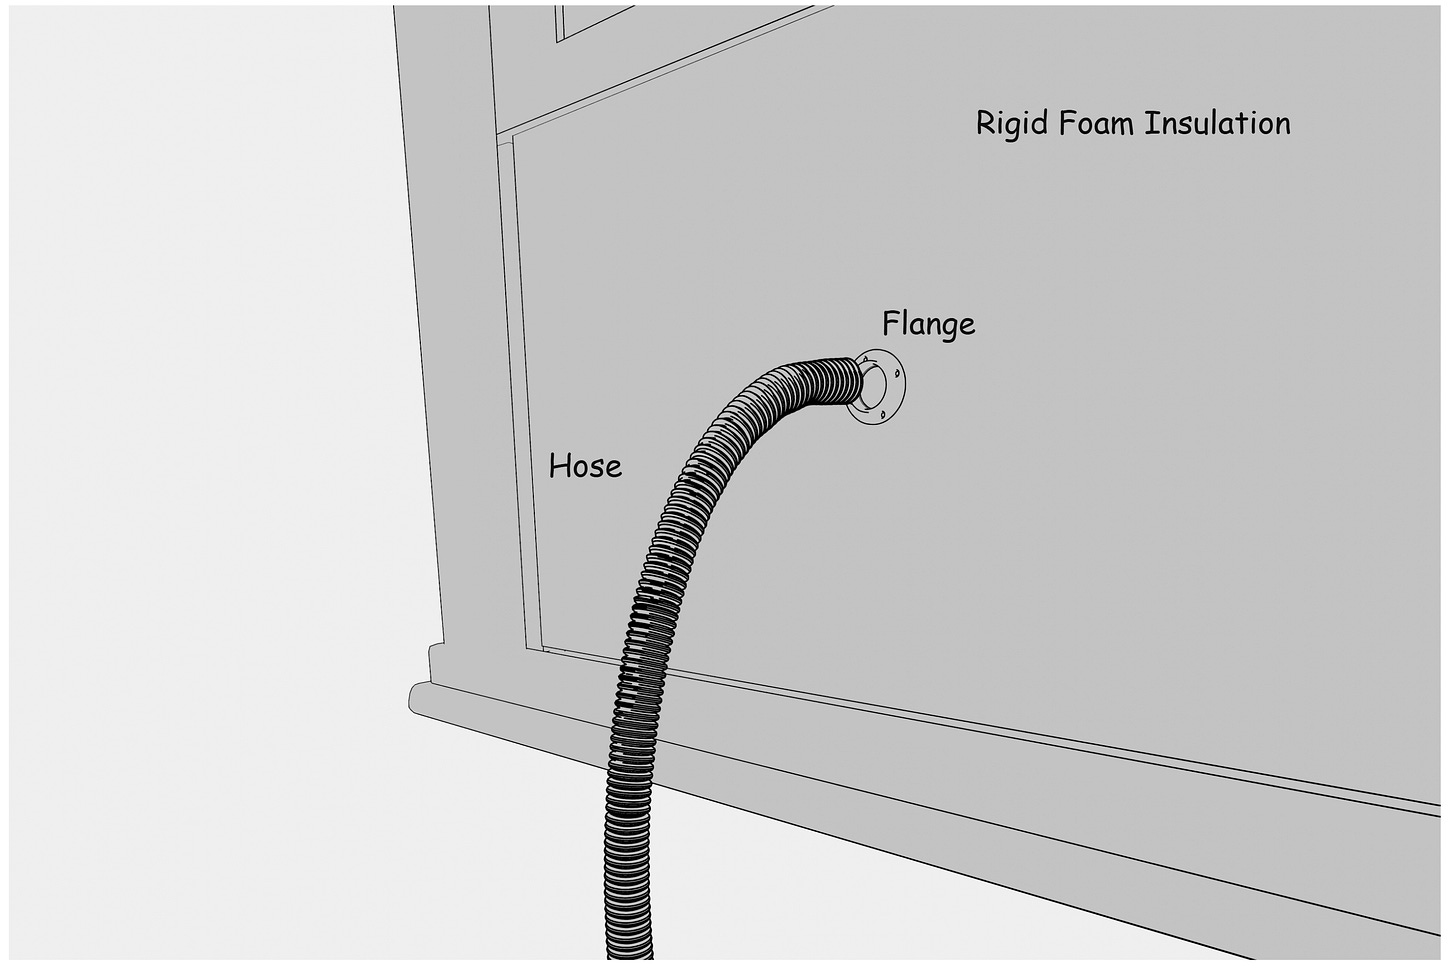
The problem for most of us is that we have no easy way to vent a composting toilet without drilling a hole through our wall. That’s a dealbreaker for almost anyone who owns a conventional home or rents an apartment.
Some composters say you don’t need ventilation, but you kinda do, especially if you want to dry it out faster. Drying your solid waste shrinks it up to 90 percent, and that’s essential for those of us with smaller yards. That goes double if you have no yard, and you have to dispose of your waste elsewhere.
We solved that problem.

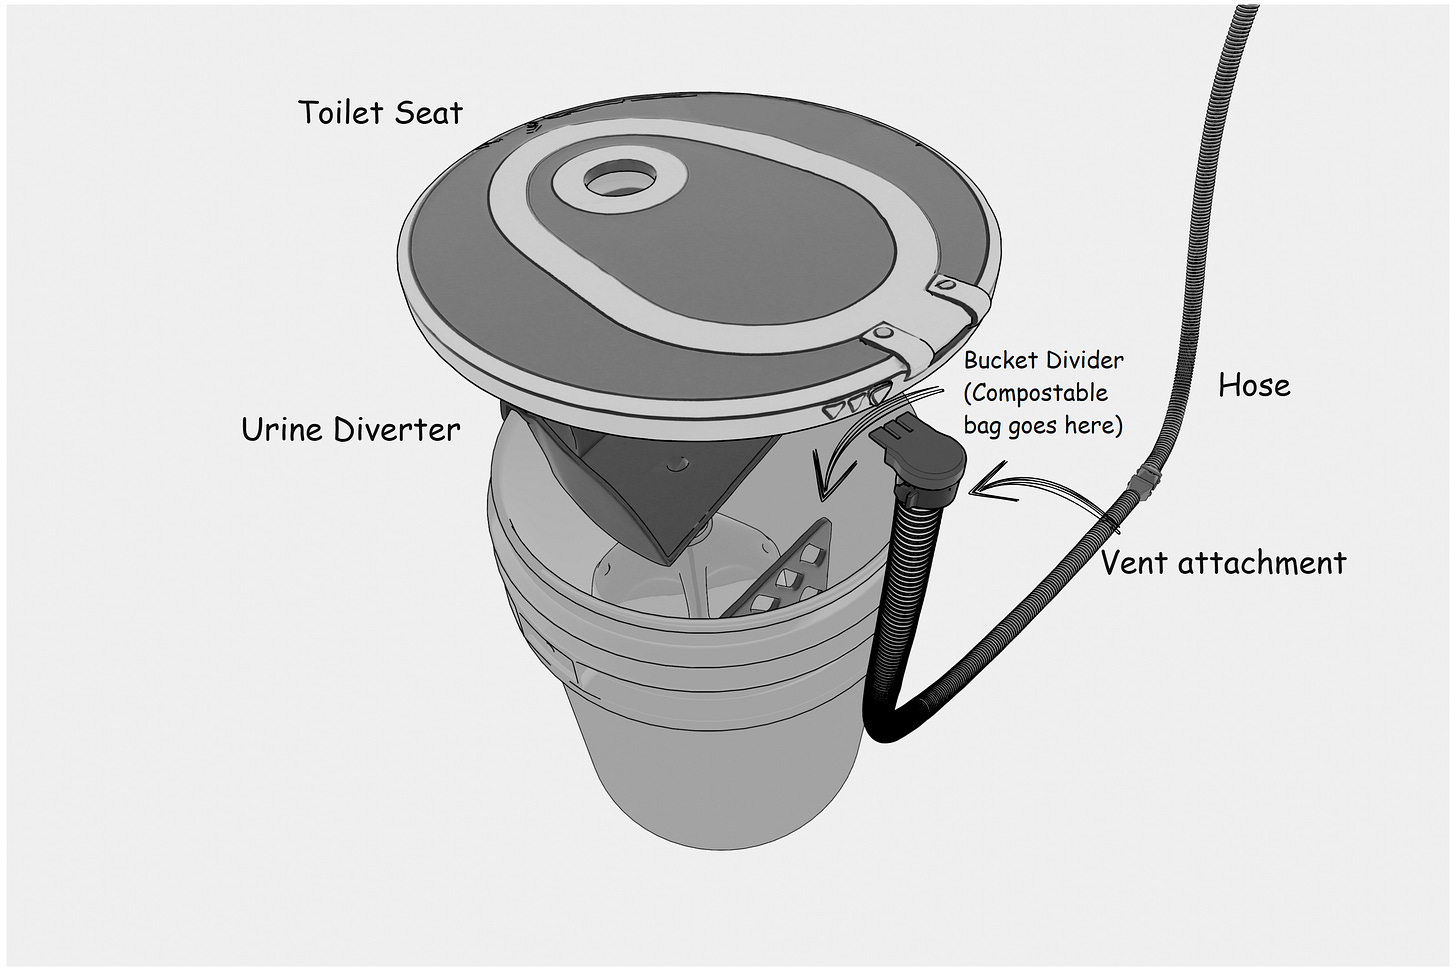
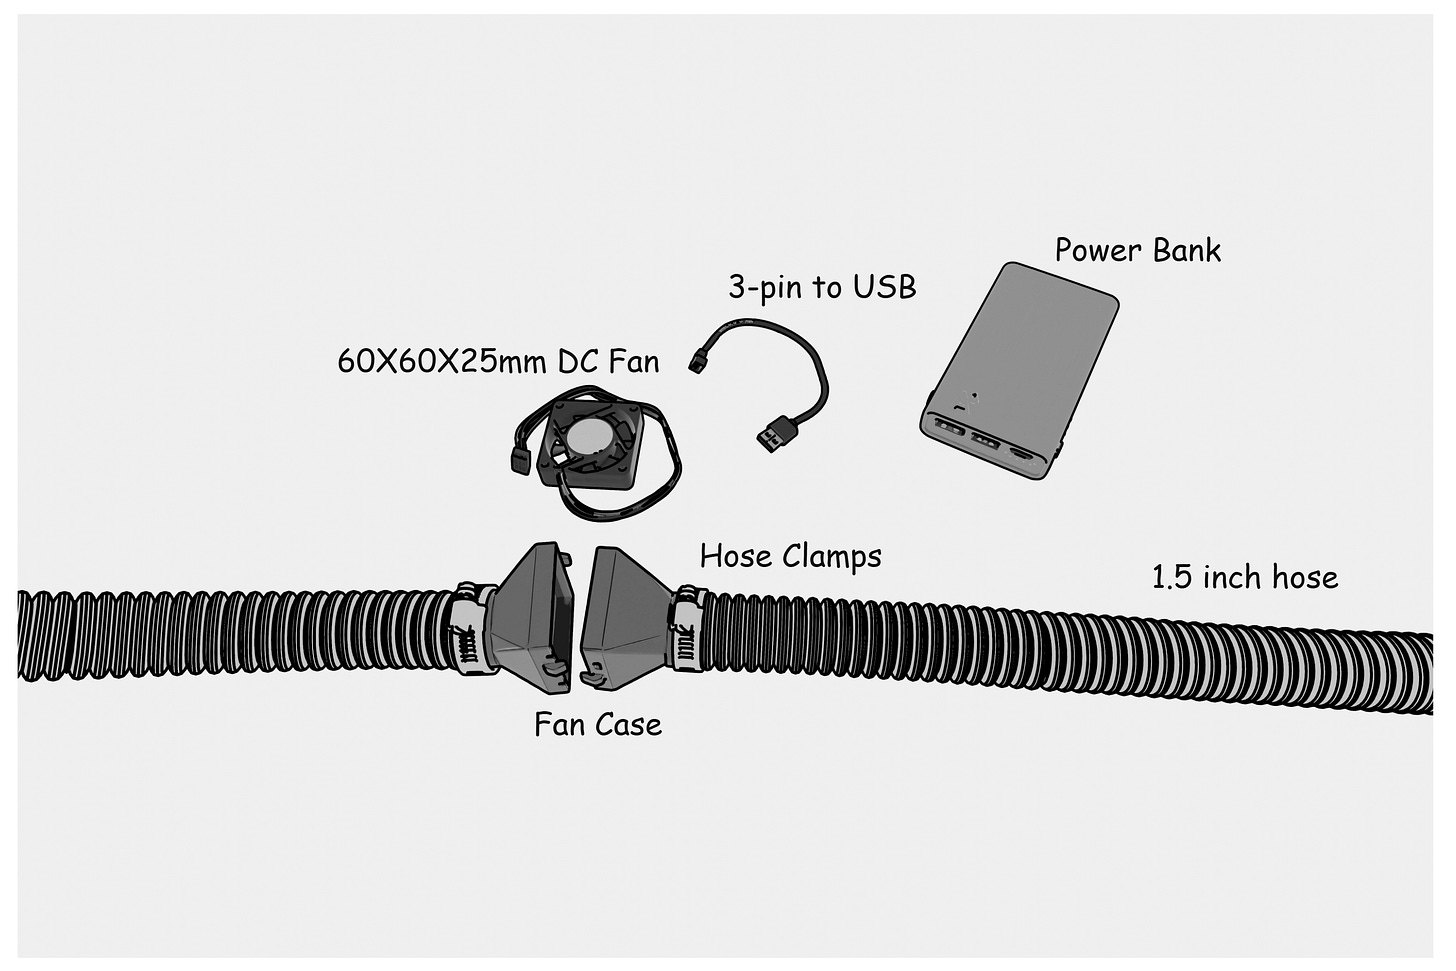
Now you have a composting toilet for short and longterm emergencies. It’s going to separate your liquids and solids. It’s going to vent outside. It’s not going to smell. It’s going to dry out your solids.
You don’t have to buy any of this from Johnny Compost, the company that sells the NettyGo. I have no relationship with them. Once you understand the basic idea, you can design your own and source your own parts. Johnny Compost even sells some of these parts separately, like urine diverters, etc.
You’re going to want compostable bags. Many people say go with 13-gallon size bags for 5-gallon buckets. That’s for your solids.
Make sure you empty your liquid jug on a regular basis. The NettyGo comes with a bob to help remind you.
You’re going to want cover material. Plenty of compost toilet companies will sell you fancy, expensive stuff. You’re going to want a lot of cover material, and you can get cover material for cheap from stores like Tractor Supply. Many compost toilet enthusiasts recommend you get pine and aspen bedding (not cedar). You can also use coconut coir, sawdust and wood shavings, peat moss, sphagnum, and hemp. Anything with high carbon, that’s light and fluffy.
It’s a good idea to keep a second bucket of cover material next to your composting toilet, along with a scoop. Add a layer to the bottom before you start using your toilet. Add a couple of scoops each time you go. If you’re having problems with smell, spray or mist your cover material. Add a little more.
And how much space do you need?
Compost heaps don’t have to be big, 4x4x4 feet is fine. The minimum size is one cubic yard, or about 1 cubic meter (.76, to be exact). That’s 3x3 at the base, and 3 feet high. In metric, that’s about 1m x 1m, and 1 meter high. Generally, you don’t want one heap to get higher than 5 feet, or 1.5 meters. A family of 4 would fill one cubic yard in about 3 months. Once you fill an enclosure, leave it for about a year. The microbes will do their job and destroy the pathogens, creating clean compost. Meanwhile, you just start another pile. So, do some simple math. An average family fills 4-5 cubic yards or meters of space in one year. That means you’ll need a second space of the same size to use while the filled-up enclosures are composting.
Add it all up…
You could do all this in a space of 5-6 cubic yards or meters. That translates into 170—220 cubic feet. That’s about the size of a living room. It’s a fraction of the size of an average back yard. Set up 4-5 bins or bays, and rotate through them. It’s a manageable amount of space. No, not everyone can do it. But many of us could. If you live downtown or you have a landlord, then the major obstacle becomes convincing others to help you make it work. They might act like you’re crazy at first. When they start to envision the alternative…
They might come around.
So, you fill up the cubic meter. You let it sit there and mature. That’s the precise term for it. You’re not adding to it anymore. You’re letting it mature. That’s what composters say, meaning you just leave it alone.
You leave it alone for an entire year.
What happens, exactly?
Thermophilic bacteria dine out, producing heat. If you provide the right mix of waste and carbon cover material, these microbes will activate and maintain a high temperature on their own, even during cold winter months. It could be snowing outside. The environmental temperature could plunge well below freezing. Feed your compost pile, and it will keep taking care of itself, even if the temperature drops and the microorganisms go dormant. They’ll reactivate in the spring.
Jenkins advises keeping the ratio of carbon cover material to waste at 20:1. You don’t have to measure it exactly. Just track it.
You can also buy a compost thermometer. It will tell you when the temperature is running low. When the temperature runs low, add a little more material. Pour some water on it to add moisture. Turn it a little. You don’t have to turn it as much as some of the composting gurus say. Jenkins cites research that excessive turning doesn’t make much difference.
That’s it.
If you compost human waste properly, then you don’t need much except carbon cover material and an enclosure. Cover material for your outside pile means everything from sawdust to kitchen scraps and yard clippings.
Your waste provides the nitrogen. Nature provides the carbon. You build your enclosure, using whatever materials you have on hand. You can screw together some palettes. You can use t-posts and mesh. You just need some kind of structure. You dig a shallow pit in the middle. You put down a base layer of cover material. You dump your waste and scraps in the center. You cover it. You keep adding to the center, raking it outward as it grows.
You don’t need a thick base layer. In fact, initial contact with soil is good, because microbes will come in and start feasting.
You don’t need a basin or a bin in most cases, because active composting piles absorb huge amounts of moisture. They police themselves and prevent leaching. If you live in an area with excessive rain, the most you might need to do is add a roof, or even just a tent with a tarp.
You would be surprised…
Where we live, no codes exist for composting. There’s only one law, that you can’t use it in a garden. We live in the suburbs of a mid-size city. So, you just need to manage your piles. Follow the science. Don’t do anything reckless or dumb. If your compost stinks, if it attracts flies, if it starts to look ugly and neglected, your neighbors will notice. That’s when you’ll have problems.
Just remember, drying your waste out isn’t the same as composting it. Drying it out makes it easier to manage. It helps with the smell. You still have to compost it, as described in the steps above.
Between wars and climate disasters, we’re in for a rough time. I firmly believe my family will be using our emergency composting toilet at some point over the next few years, maybe even later this year.
We just don’t know, and that’s the point.
Panicking is a natural thing to do given the crises we’re facing. After you panic, you have to come up with a plan. That’s what we’re doing.
From panic, to plans.
Stay grounded.
Survival Illustrated is a reader-supported publication that also receives funding from organizations like the Alfred Kobacker and Elizabeth Trimbach Fund. You can offer one-time support here. To receive new posts and support this work on a more regular basis, consider becoming a free or paid subscriber.
Escape wishful thinking.